Go-tcha „tethering“ mod / get rid of the charging dock
Long time ago my Go-tcha (Manufacturer site) lost its button (long story lol). Since then I’ve used it without the lid so I can trigger the button with, in example, a key. But some months later the inevitable happened, the device itself felt out of the case and I’ve thought it would be gone for good. Since then I basically stopped Pokemon Go because of laziness and being so used to the automatic stuff of the Go-tcha.
Yesterday I happened to re-organize and cleanup the cable mess at my desk and guess what turned up? The Go-tcha! (Yeah, that wasn’t that surprising now…). Guess what haven’t turned up? The charging dock – badummmtss. But as Go-tcha owners will now – that dock sucks hard anyway. Getting the Go-tcha to reliable connect in it can be quite a trial of your patience…
Tether the Go-tcha and give it a fixed charging cable
So I took a 30cm MicroUSB cable and cut the MicroUSB connector, exposed the most likely VCC and GND lines and measured them to be sure. To my surprise the color coding was actually correct (never trust your cables). Some shrink wrap helped to nicely put the now unused data lines away and „close“ the cut end of the cable.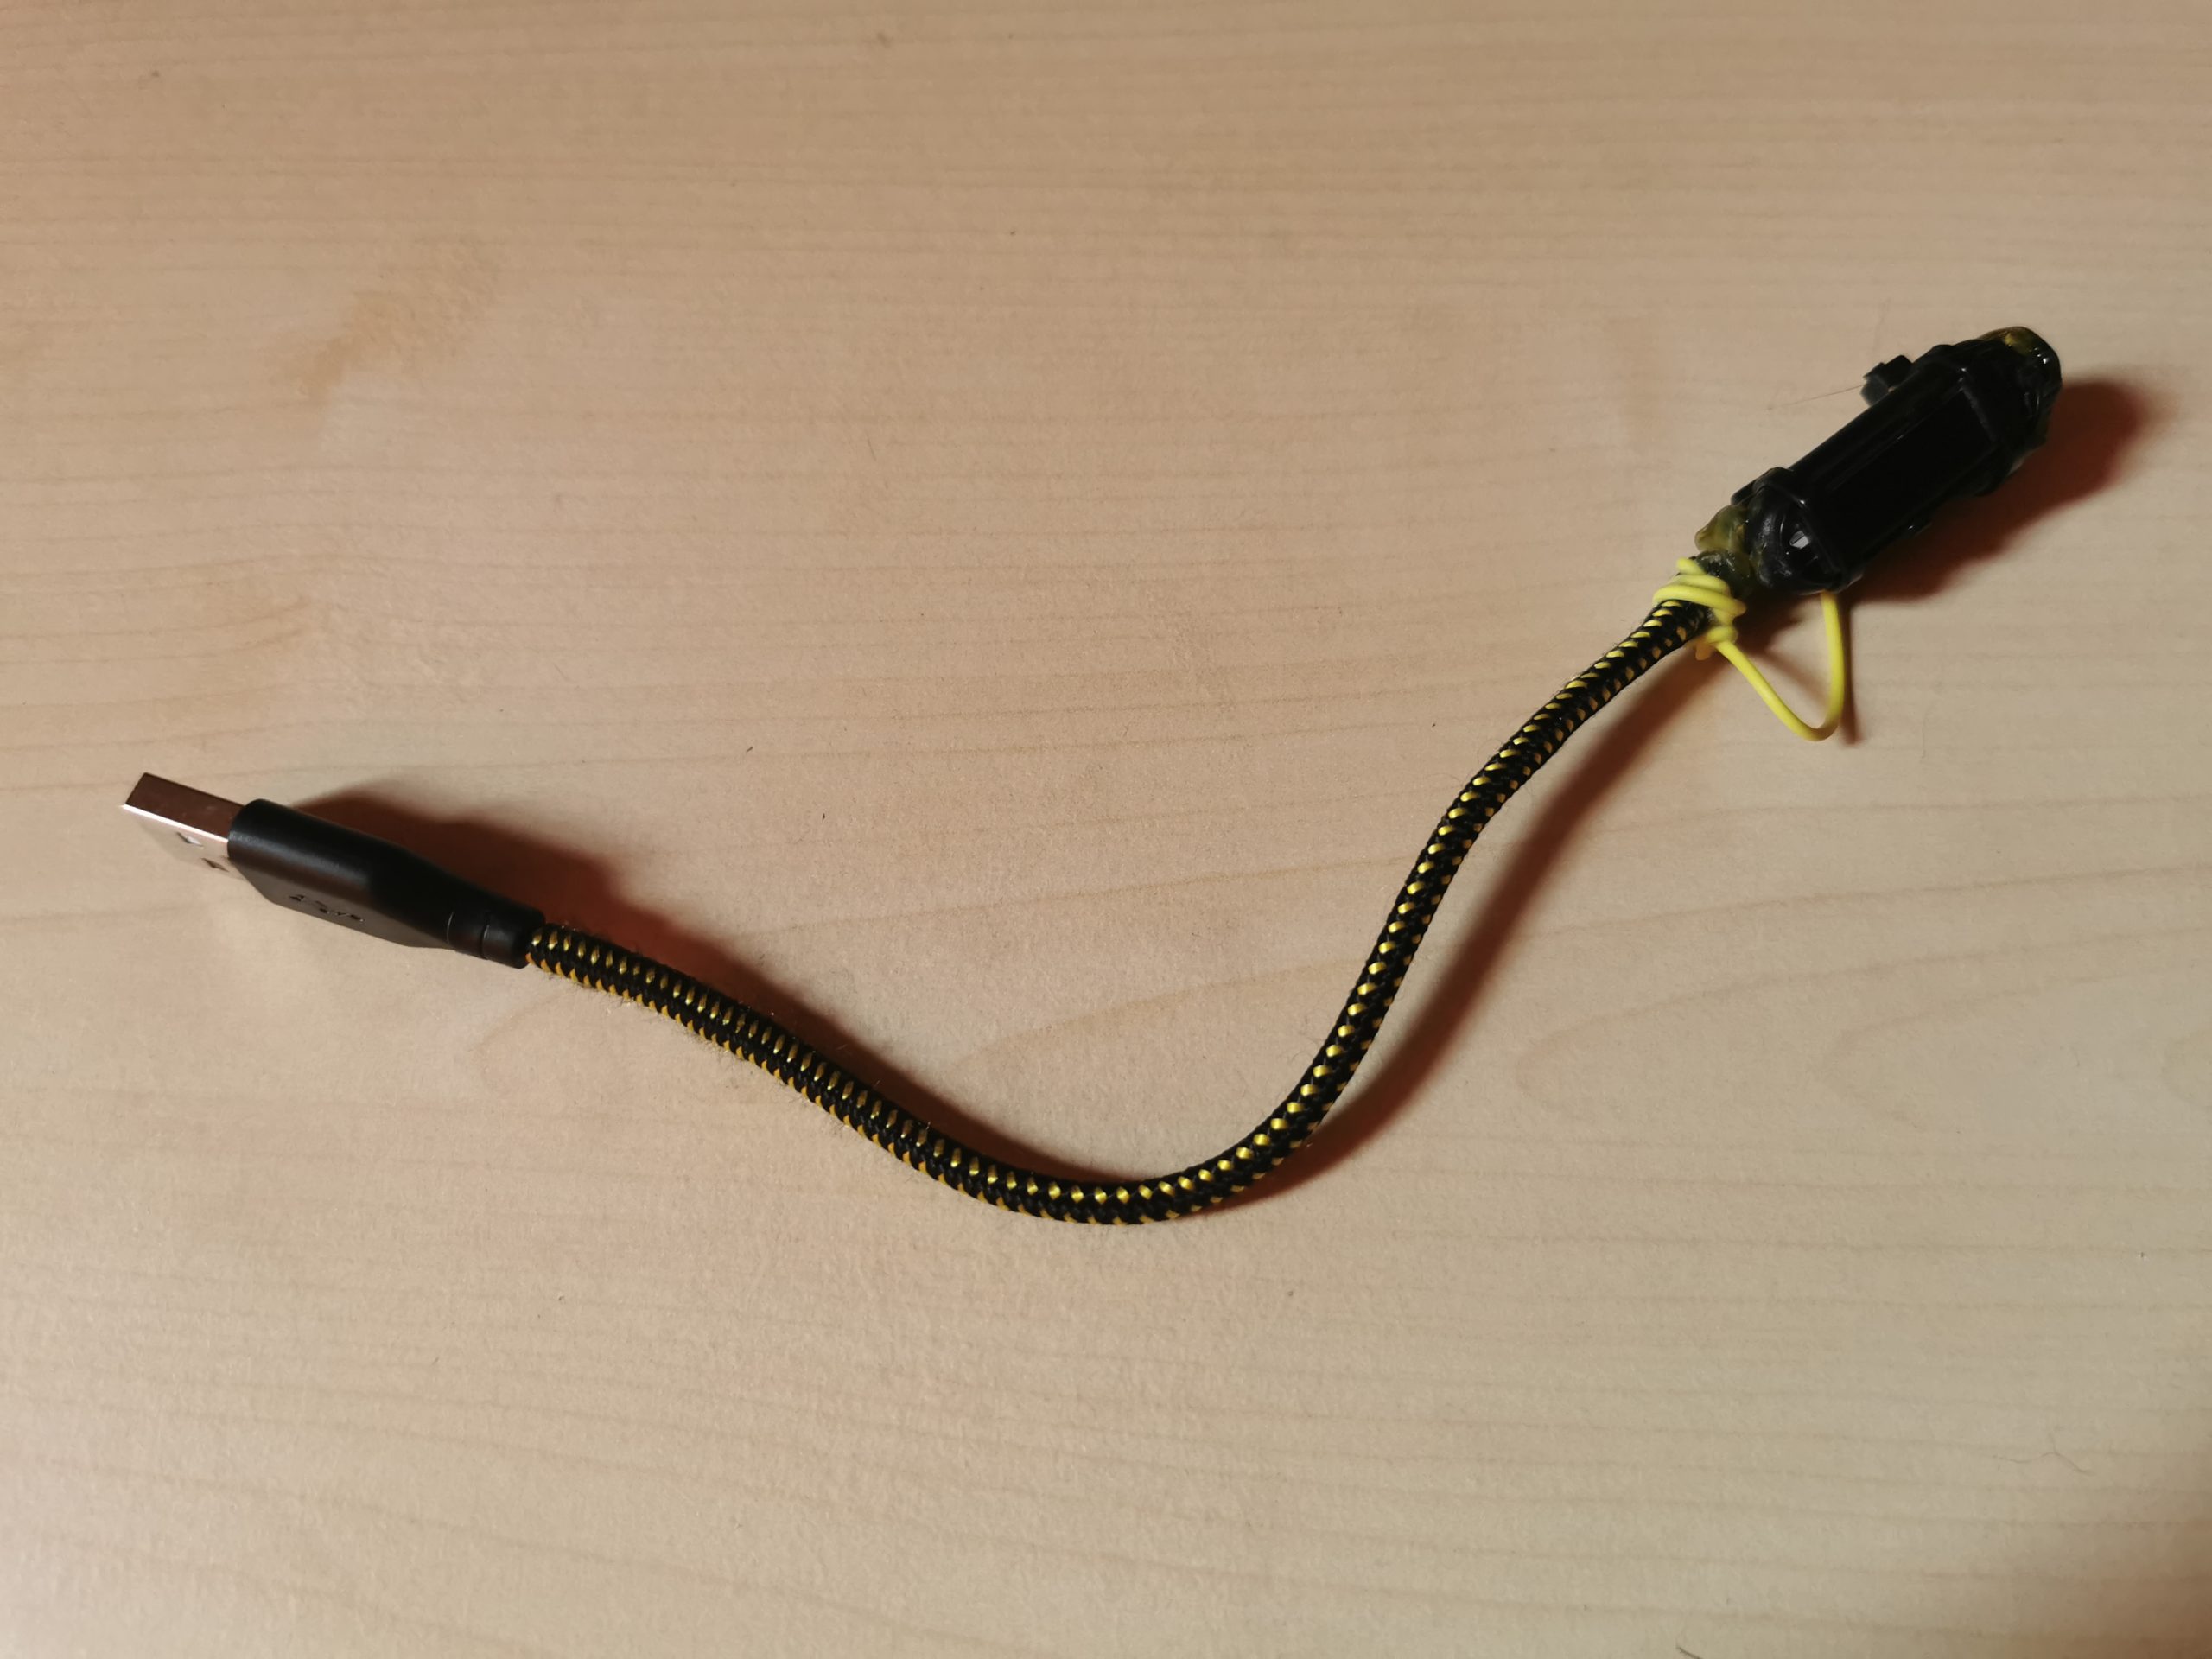
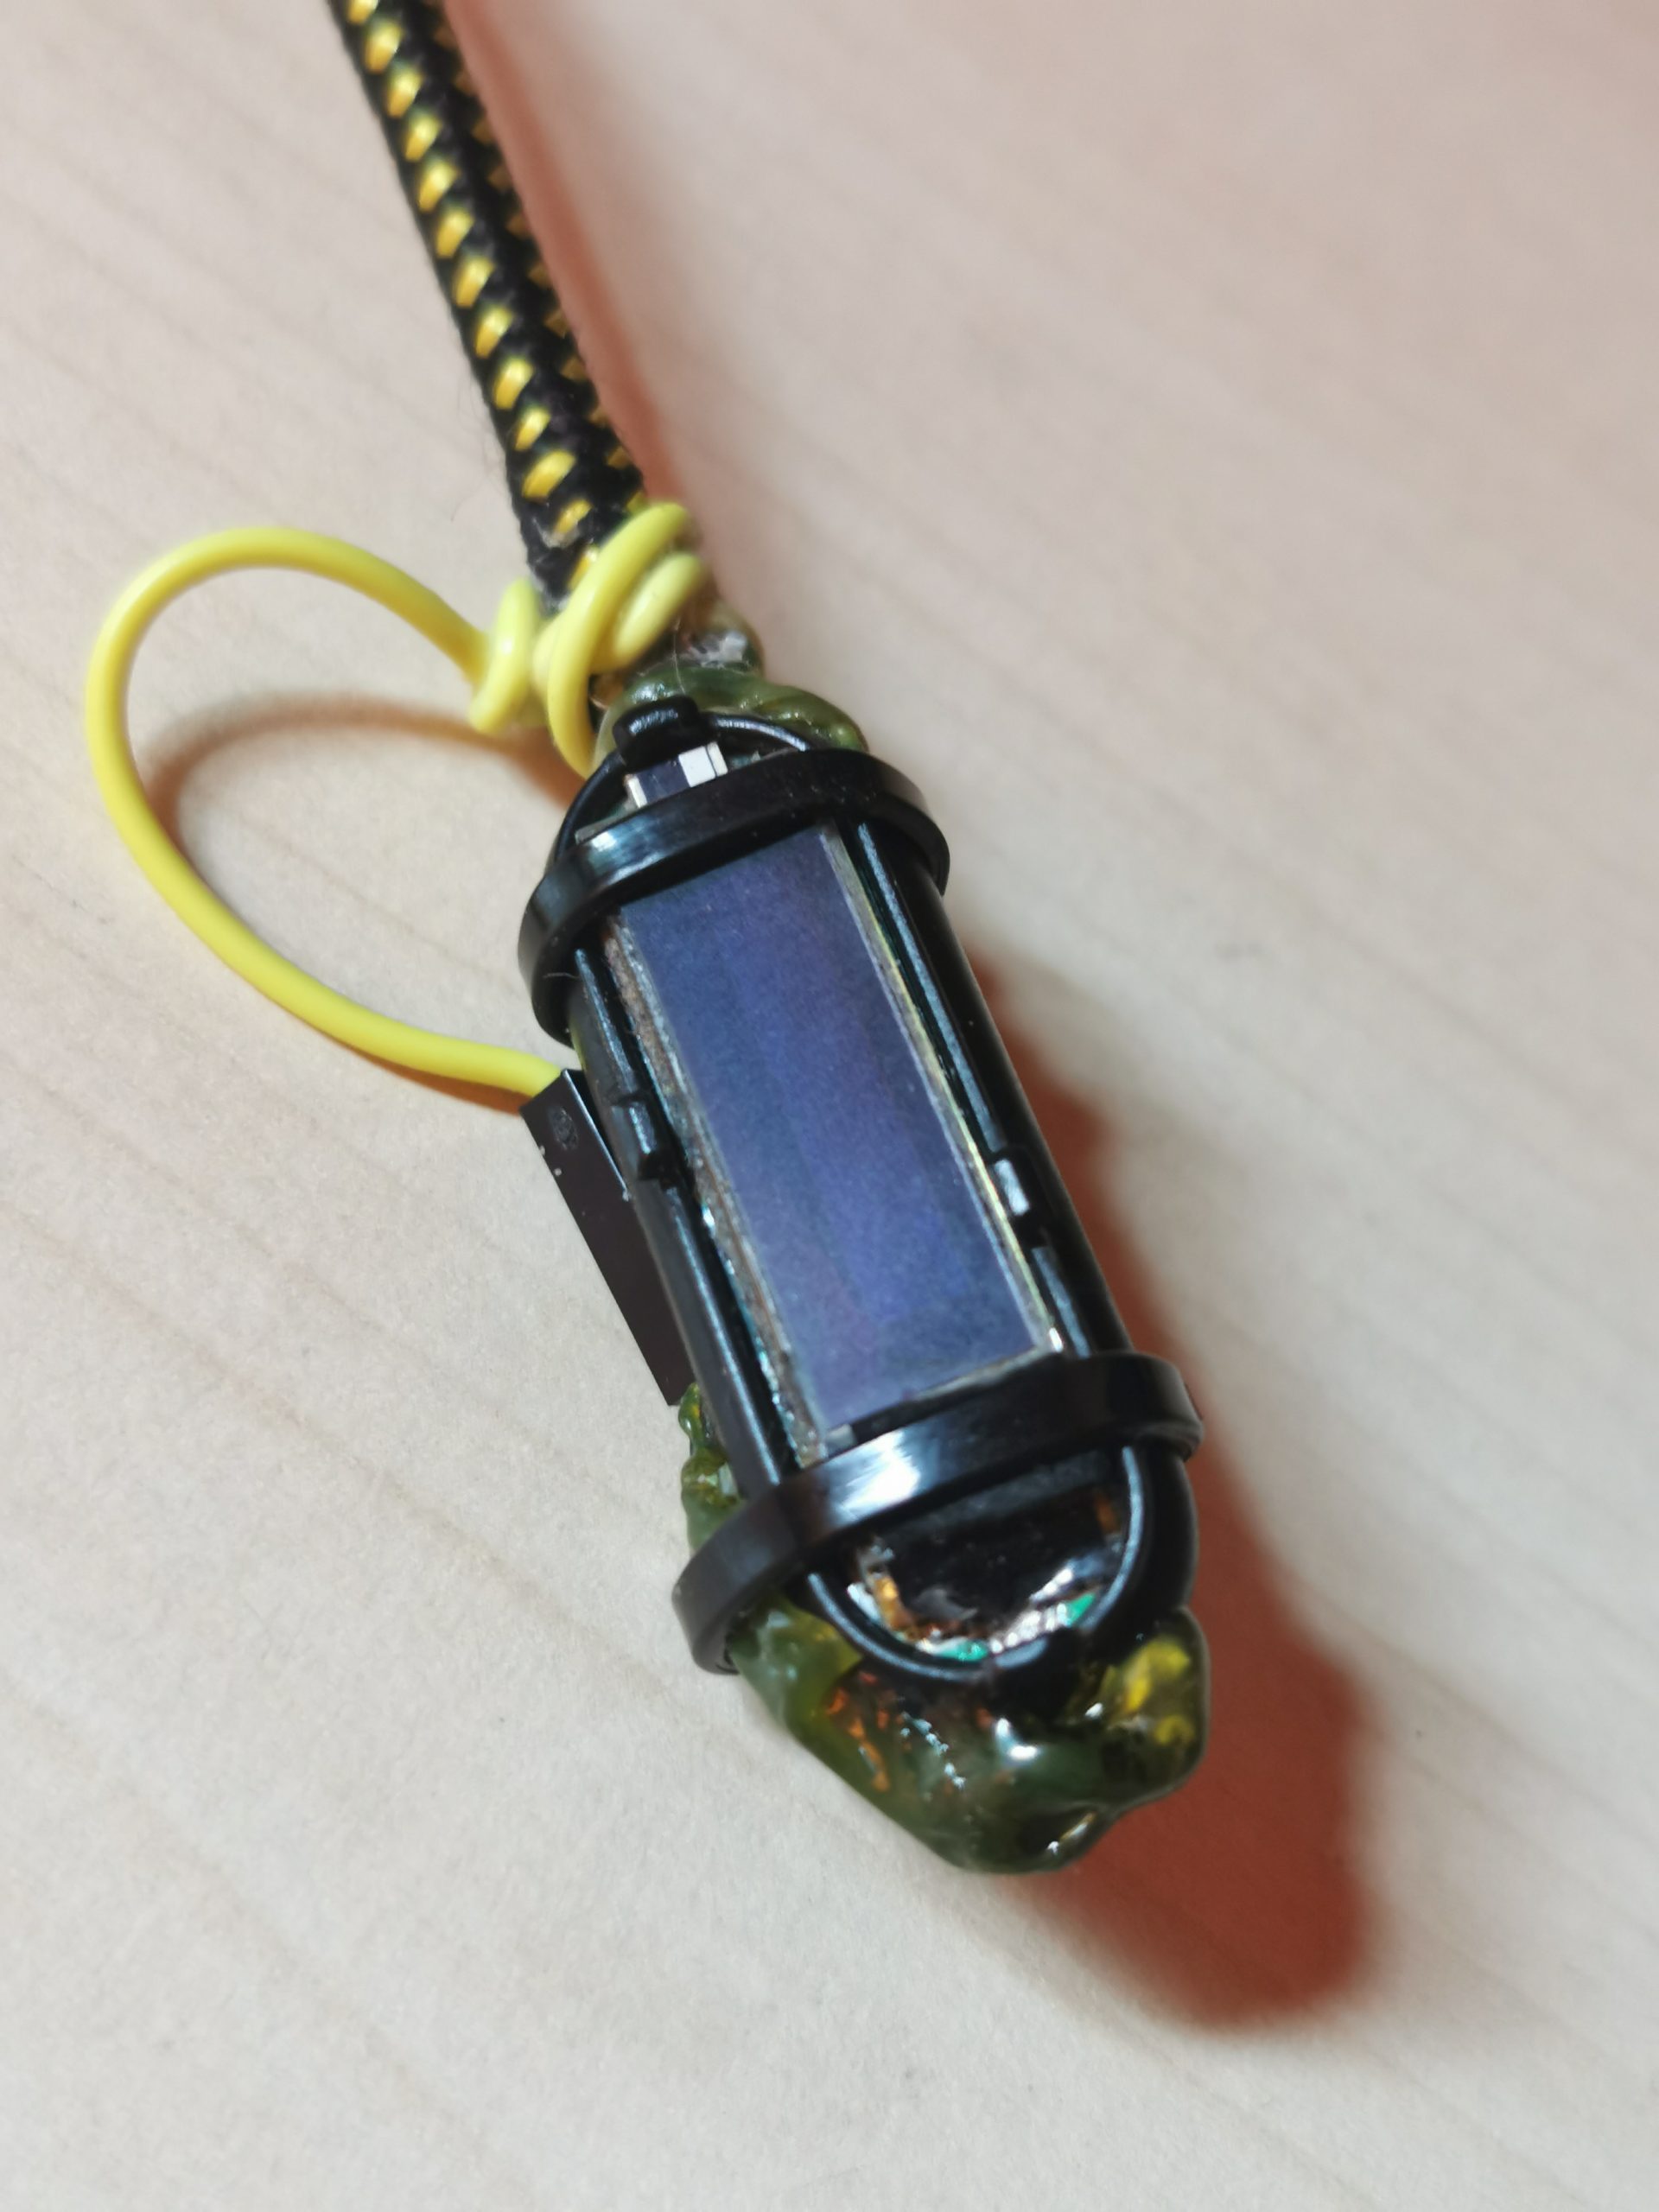
With the cable now prepared I’ve checked the Go-tchas PCB which connector in the case is VCC and which one is GND. They are nicely labeled so that was easy. Then I just soldered the lines from the USB cable directly to the pins on the case. You should clean and flux the pins before if you want to apply this mod, I didn’t and it took a hell lot of solder to get the wires fixed in place. Heating the cable and the pin at the same time would help with flow, too. In case you wonder why I haven’t soldered directly to the PCB: I want to keep the hardware unmodded so I can maybe later easily move it in another case.
Some superglue and hotsnot is used to fix the cable to the back of the case, for tidiness and strain relief. Additional hotsnot is isolating the ex-dock-connector-pins / connection points to the cable. Sadly I only have colored hotsnot around from the kids, and heated it with a lighter. So it looks really bad even for hotsnot standards.
Fix the missing button
Since we are deep into „most ugly mod of the year“ territory by now, we can do similar for the button. The button is a capacitive one, you just need to make contact to the pad with pretty much anything having a electrical capacity.
I’ve took a F/M jumper cable and cut the female connector directly after the connector. The loose end of the jumper cable got tied (yes, literally) to the USB cable and fixed with superglue. After that I took the previously cut female connector and hotsnot’ed it to the side of the case. Now I can use the male connector of the jumper cable to trigger the button and store it in the female connector when not used right now.
To prevent the hardware from falling out of the case again I’ve added – no, not more hotsnot – two cable ties. One of them is also securing the „button-trigger-cable-holder“ (the female connector of the jumper cable) for strain relief on the hotsnot.
 Tadaaaa – fully working Go-tcha with a 100% reliable, direct, USB-A charging connector. For sure this is a candidate for „most ugly mod of the year“. Also of course it wont fit in the wrist strap anymore. But beauty wasn’t exactly a target here, neither for execution nor for the result 😅. Now I can finally play Pokemon Go again.
Sidefact: while my Go-tcha was „lost“ I’ve tried the „PocketEgg“, some knockoff of the Go-tcha. Can’t recommend it, can’t put a finger on it but it was somehow unreliable. In my opinion there is no alternative to the original Go-tcha. (No advertisement intended)